
I decided to put these pages together to show how to remove the Concert / Symphony stereo units from B8 model A4's as there is little information available on the internet forums and my local Audi dealer hadn't yet removed the head unit.
I TAKE NO RESPONSIBILITY FOR ANY DAMAGE YOU MAY DO TO YOUR VEHCILE FOLLOWING THESE INSTRUCTIONS, THE INFORMATION IS SUPPLIED AS A GUIDE ONLY!!
The tools you require to remove the head unit are:
Simply bending the end of the allen key by a little over 90° will make you a hook tool.
Various pieces of the dash need to be removed to allow access to the 4x 8mm bolts that retain the head unit.
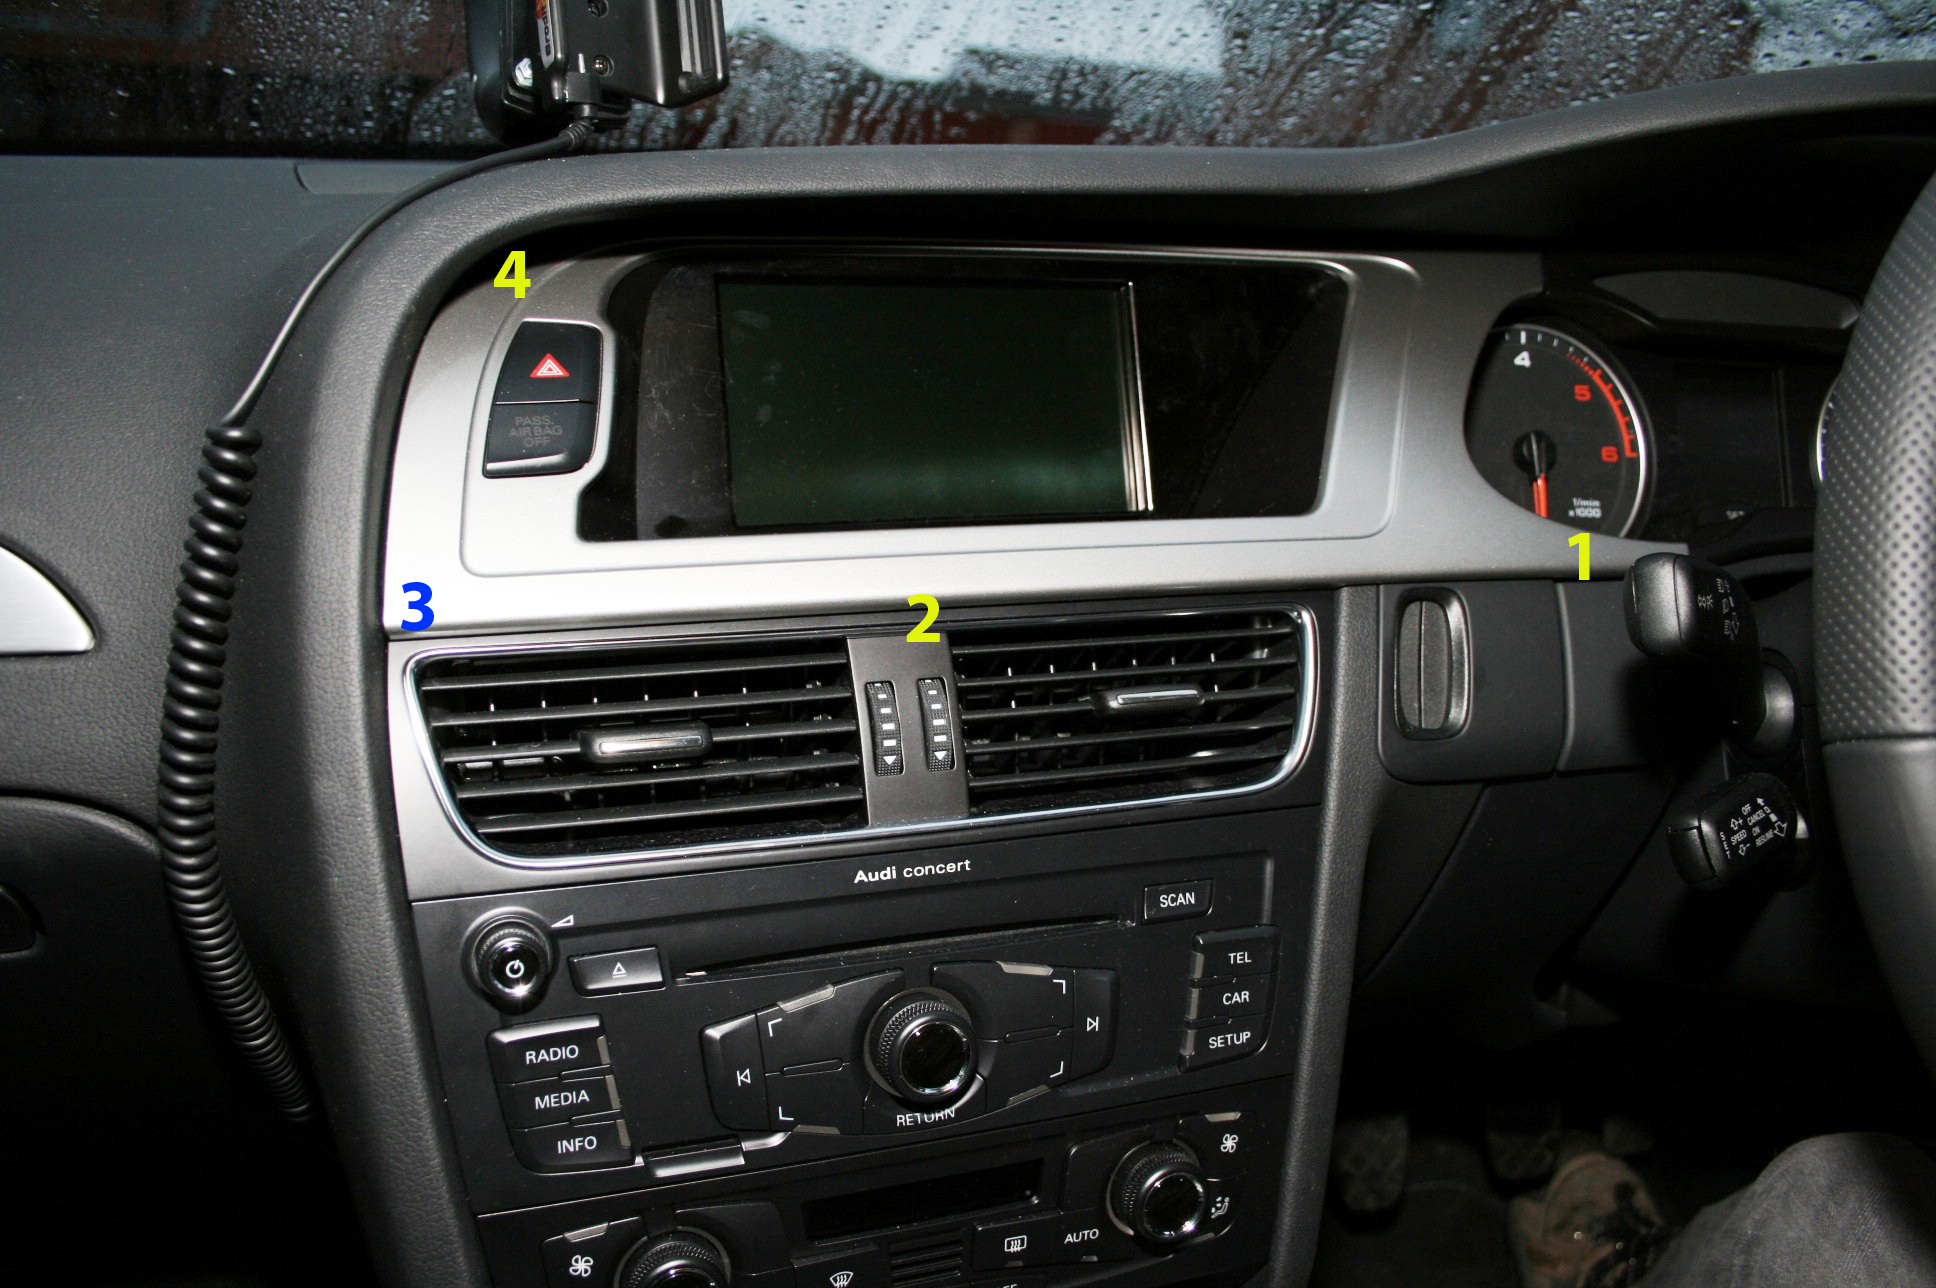
These are the MMI display trim, followed by the upper vents and then the climate control panel.
This is retained by 4x trim clips. Removal is achieved by gently pulling the trim towards you at its lower right tapered end (1). You should be able to get a finger underneath the lower edge (at 2 & 3) to release the 2 lower clips. If you can't you can insert a large flat blade screw driver at the mid point of the trim (2) above the vents to prise it away. (Be sure to wrap a cloth around the blade to prevent scratching!) It is the possible to slide the hook tool around the the gap that is created on the left hand side and up towards the top (4). Pulling your hook tool will release the two top clips.
The positions of the clips on the rear of the trim is shown below:
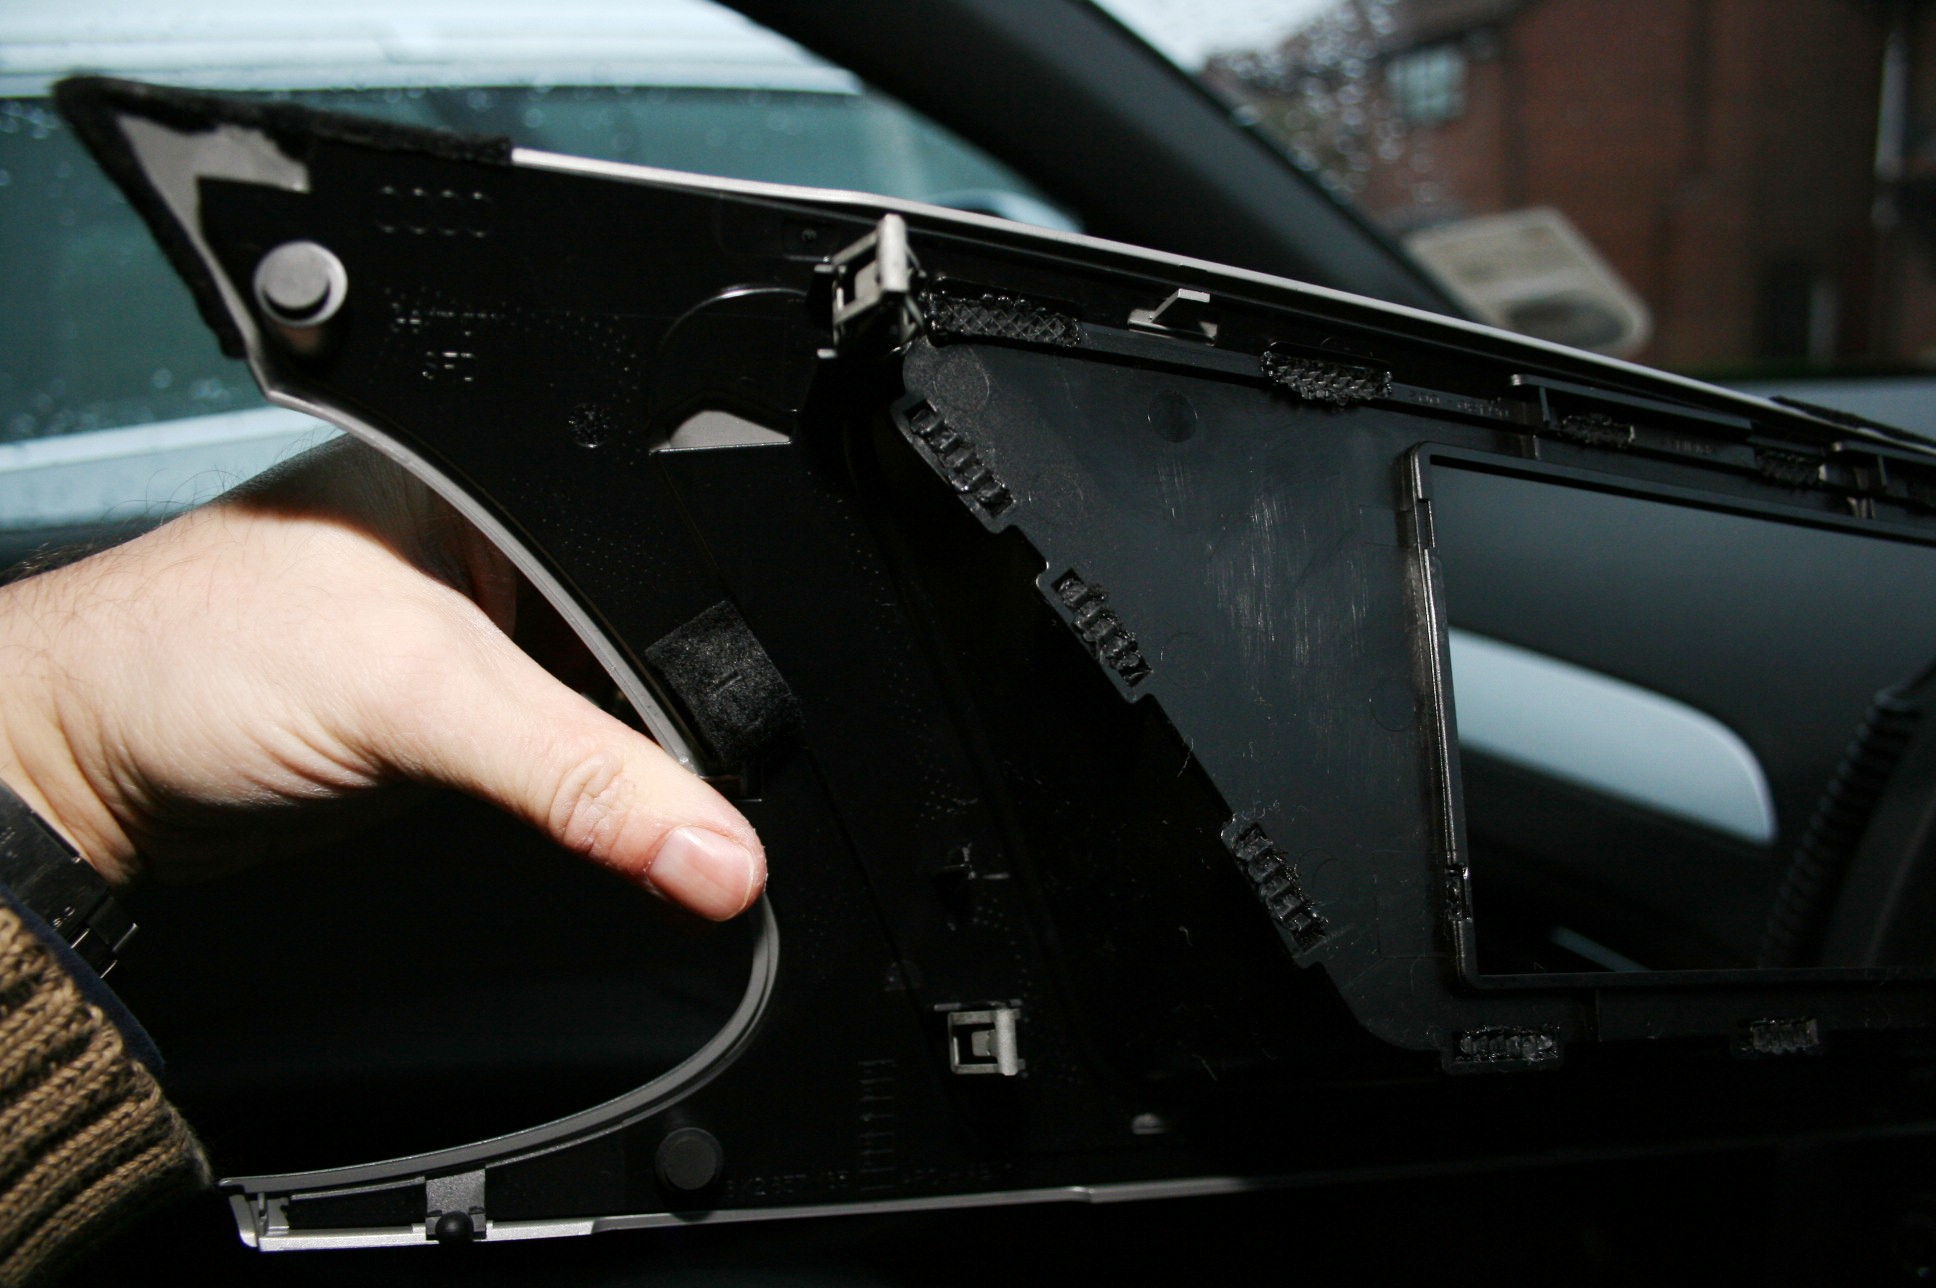
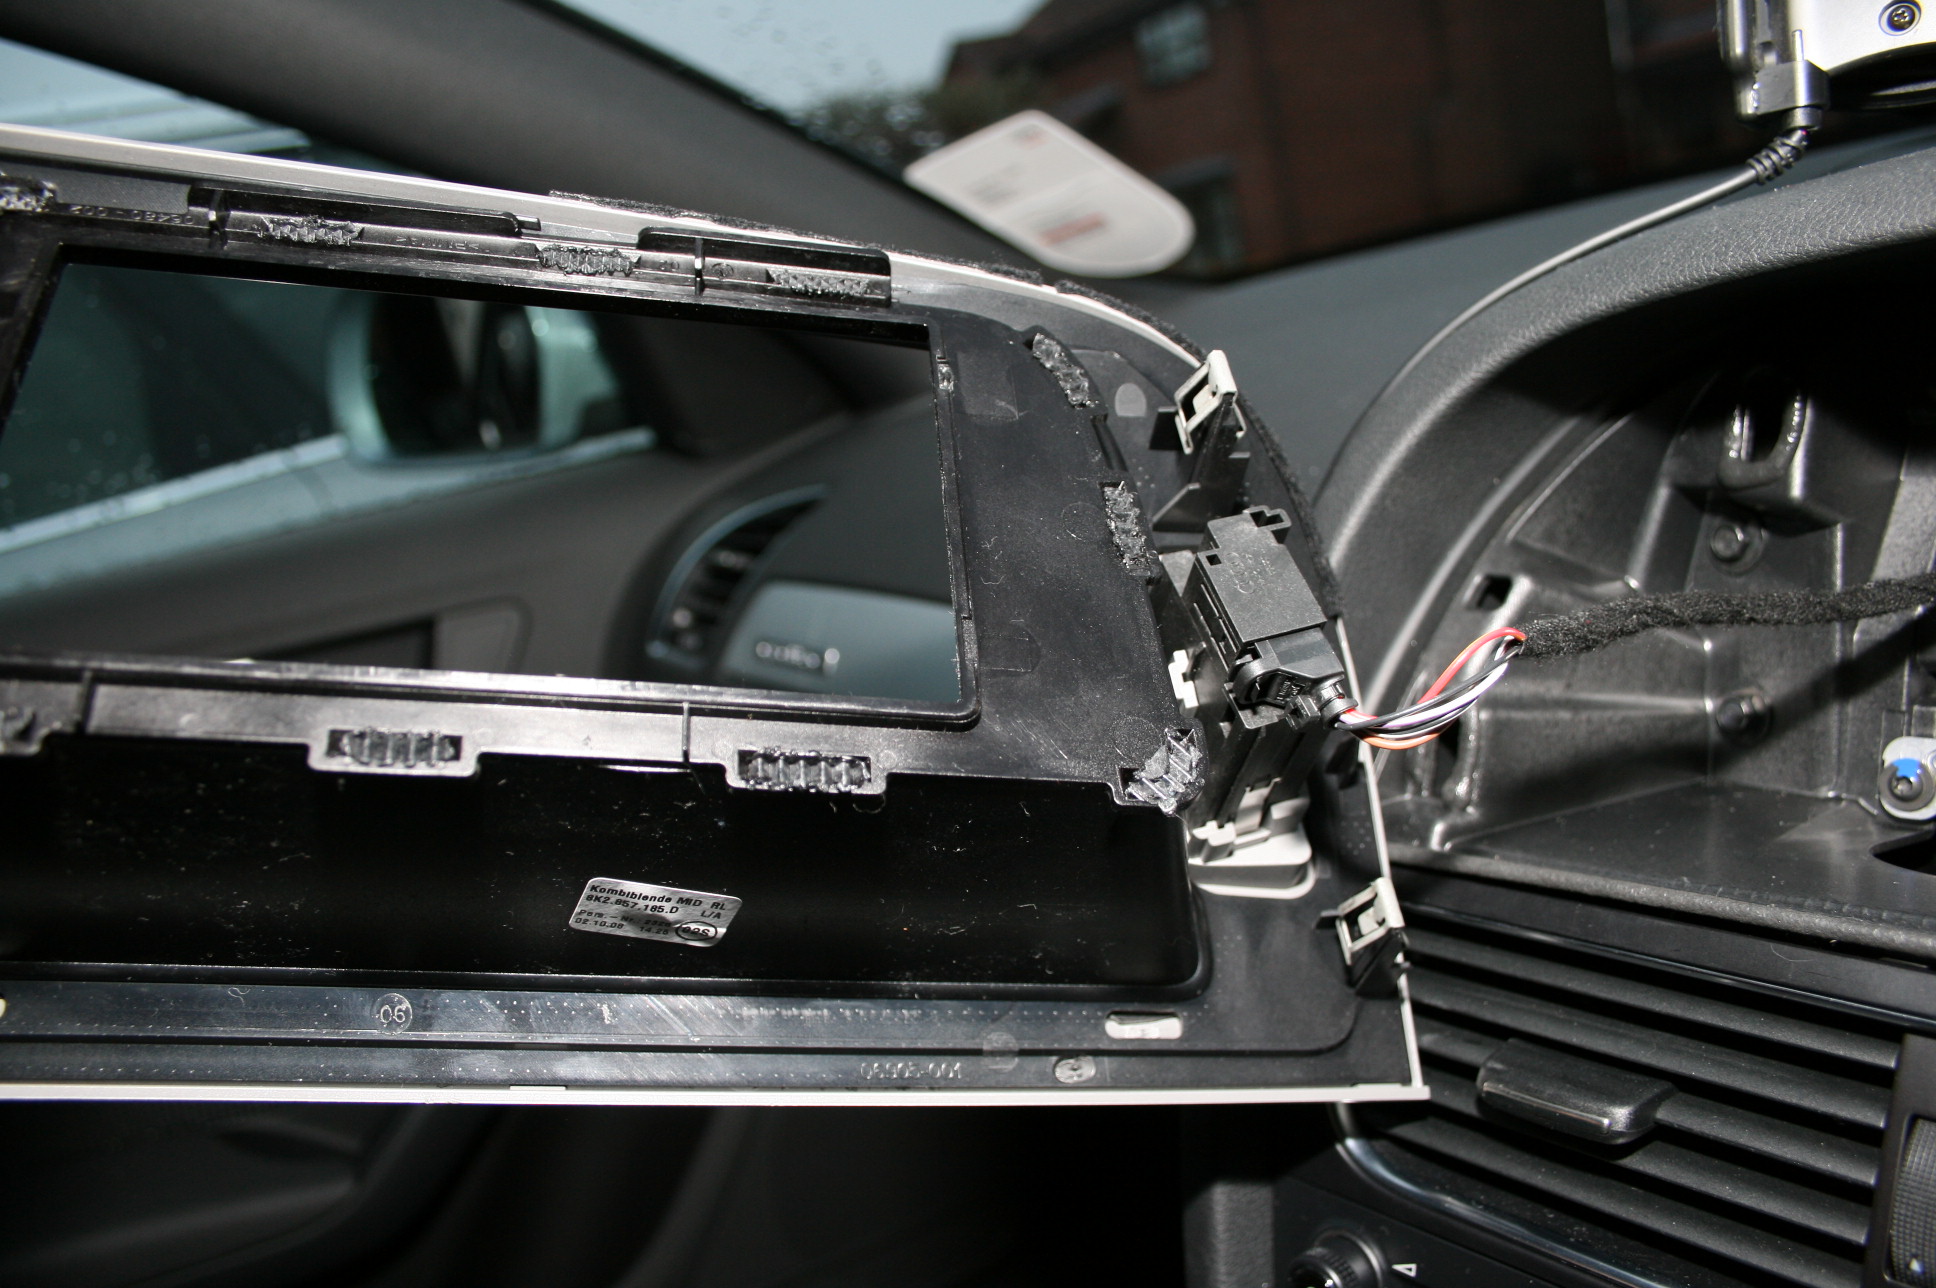
Once removed, this can easily be swung around and perched on top of the dashboard, out of the way, without the need to disconnect the Hazard warning switch / Airbag warning light harness.
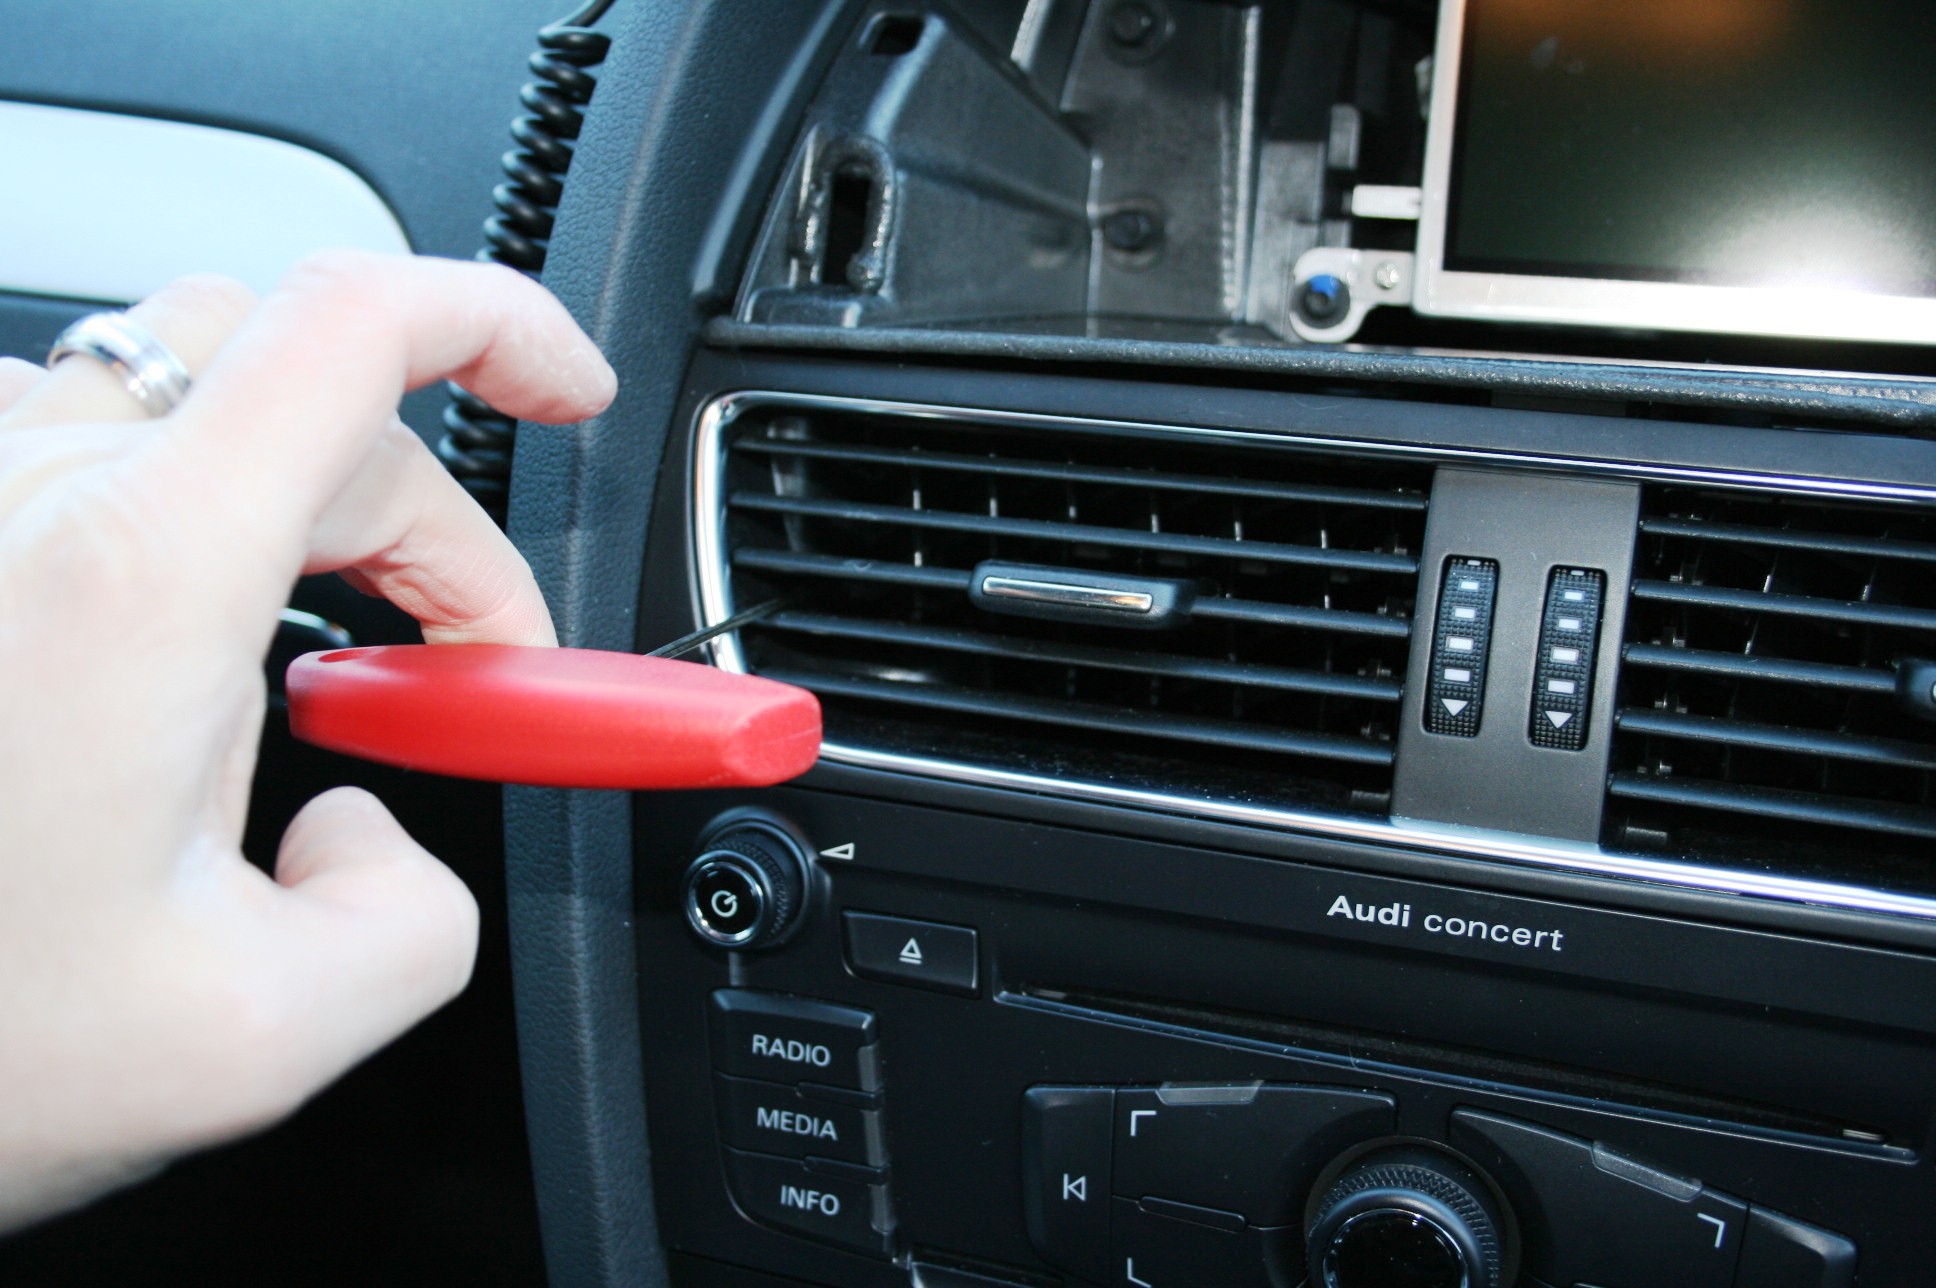
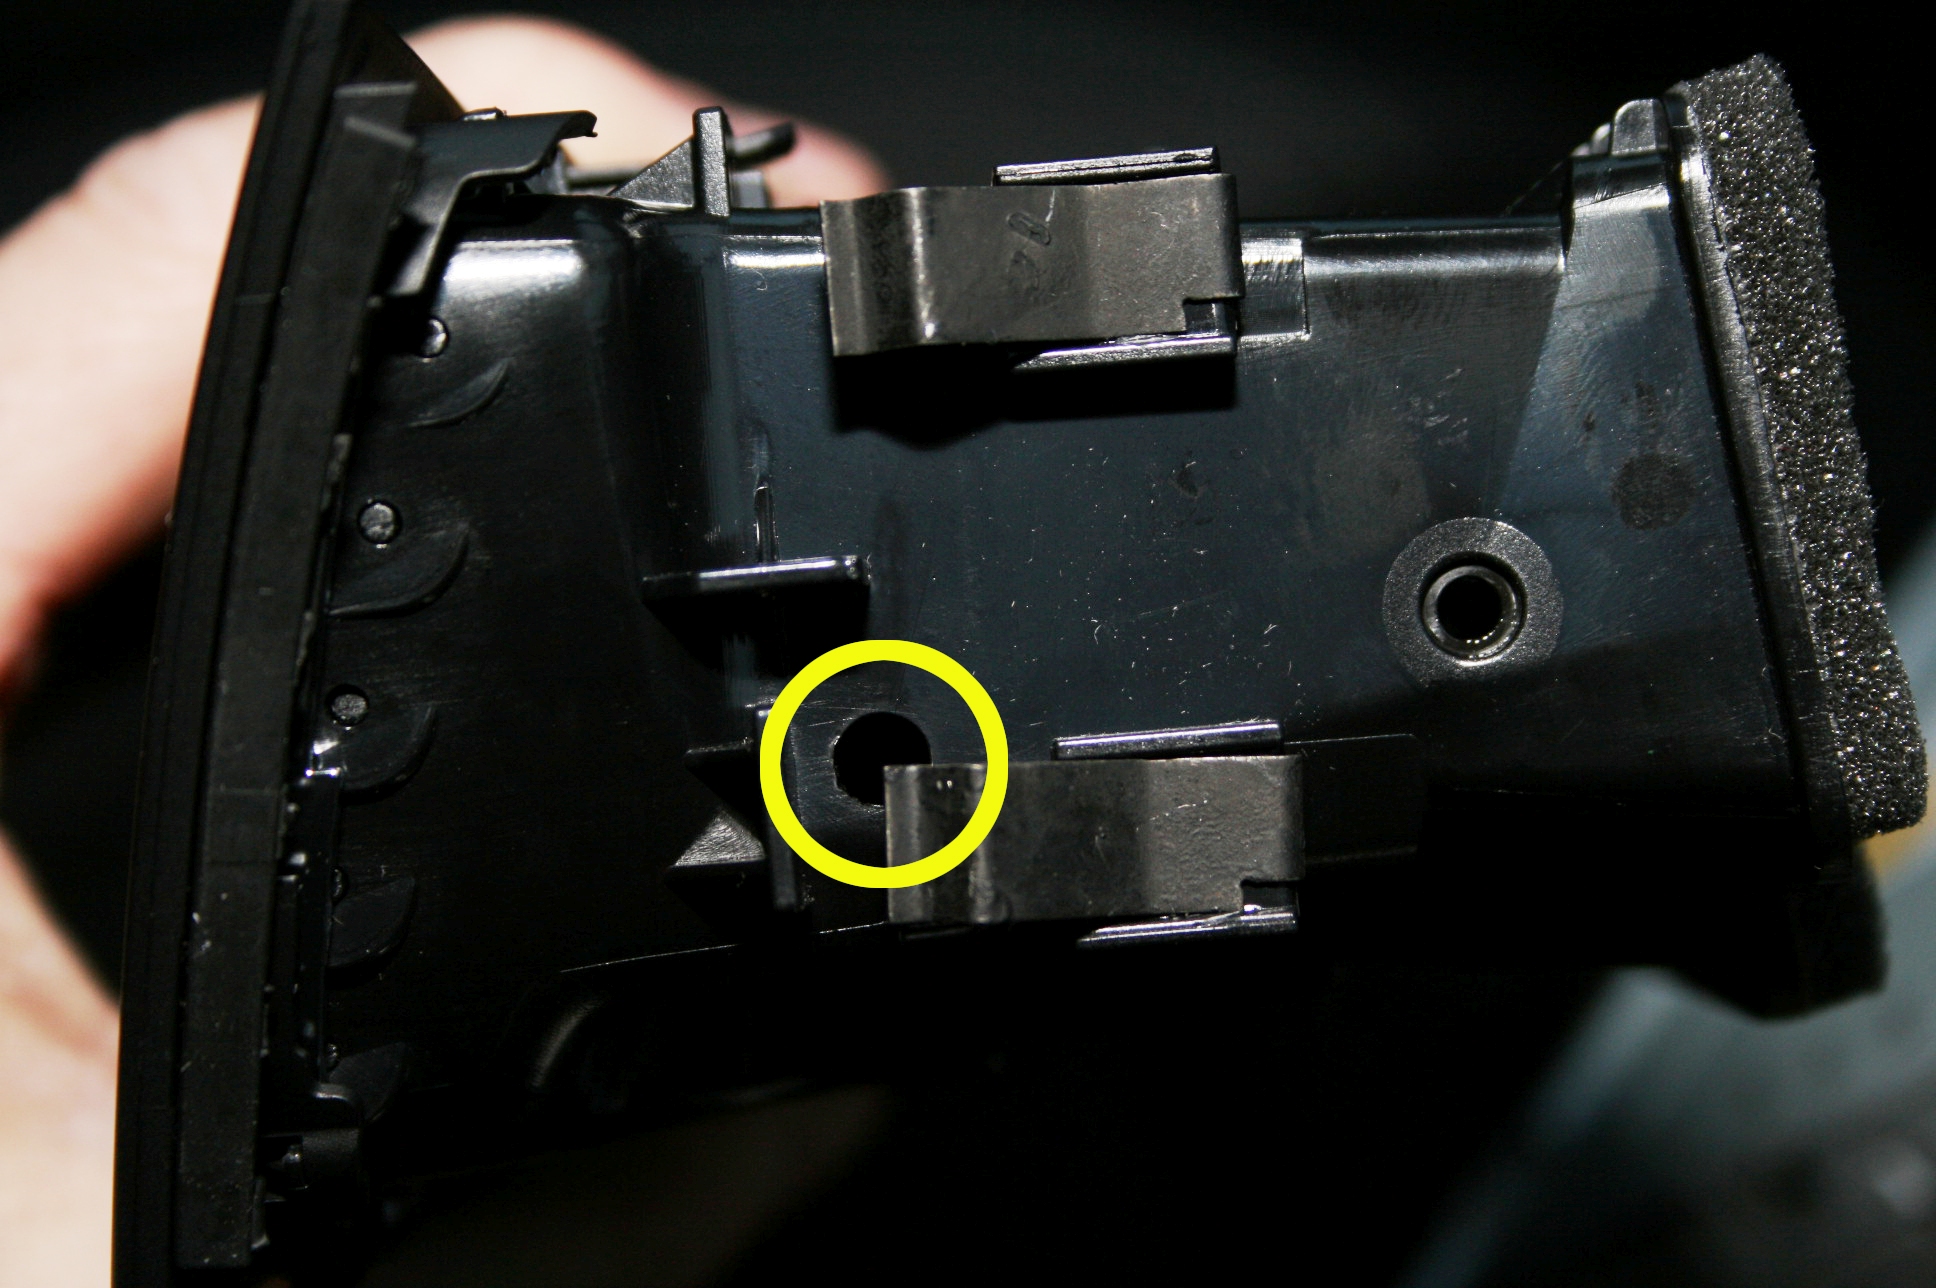
The vent assembly is retained by four spring clips, one in each corner.The assembly has a small hole at either side. Insert the hook tool into each hole in turn and pull forward to release the vent assembly. If you have illuminated vent controls, you will need to disconnect the harness. (Not shown here)
The image on the left below, shows the hook tool inserted into the left side of the vent. The yellow circle on the image on the right shows the position of the hole on the right side of the vent. The holes are at the same height on both sides of the vent assembly.
Again, this is retained by four spring clips, one in each corner. Removing this is a little more difficult as there are no holes for the hook tool. The procedure is to carefully slide the hook tool between the side of the panel and the dashboard to a depth of about 10mm. If this is done half way up the side panel, the hook can then be turned through 90°, so the hook points to the centre of the centre console.


Pulling firmly towards you will unclip the panel. Only pull far enough to release the clips on the side your are working on, other wise you may snap off the clips on the other side. Repeat the operation for the other side of the climate control panel. The panel can be tipped forward and moved to the left to give access to the lower bolts of the Head Unit. Remember to protect the top of the ash tray with a cloth to prevent scratching.
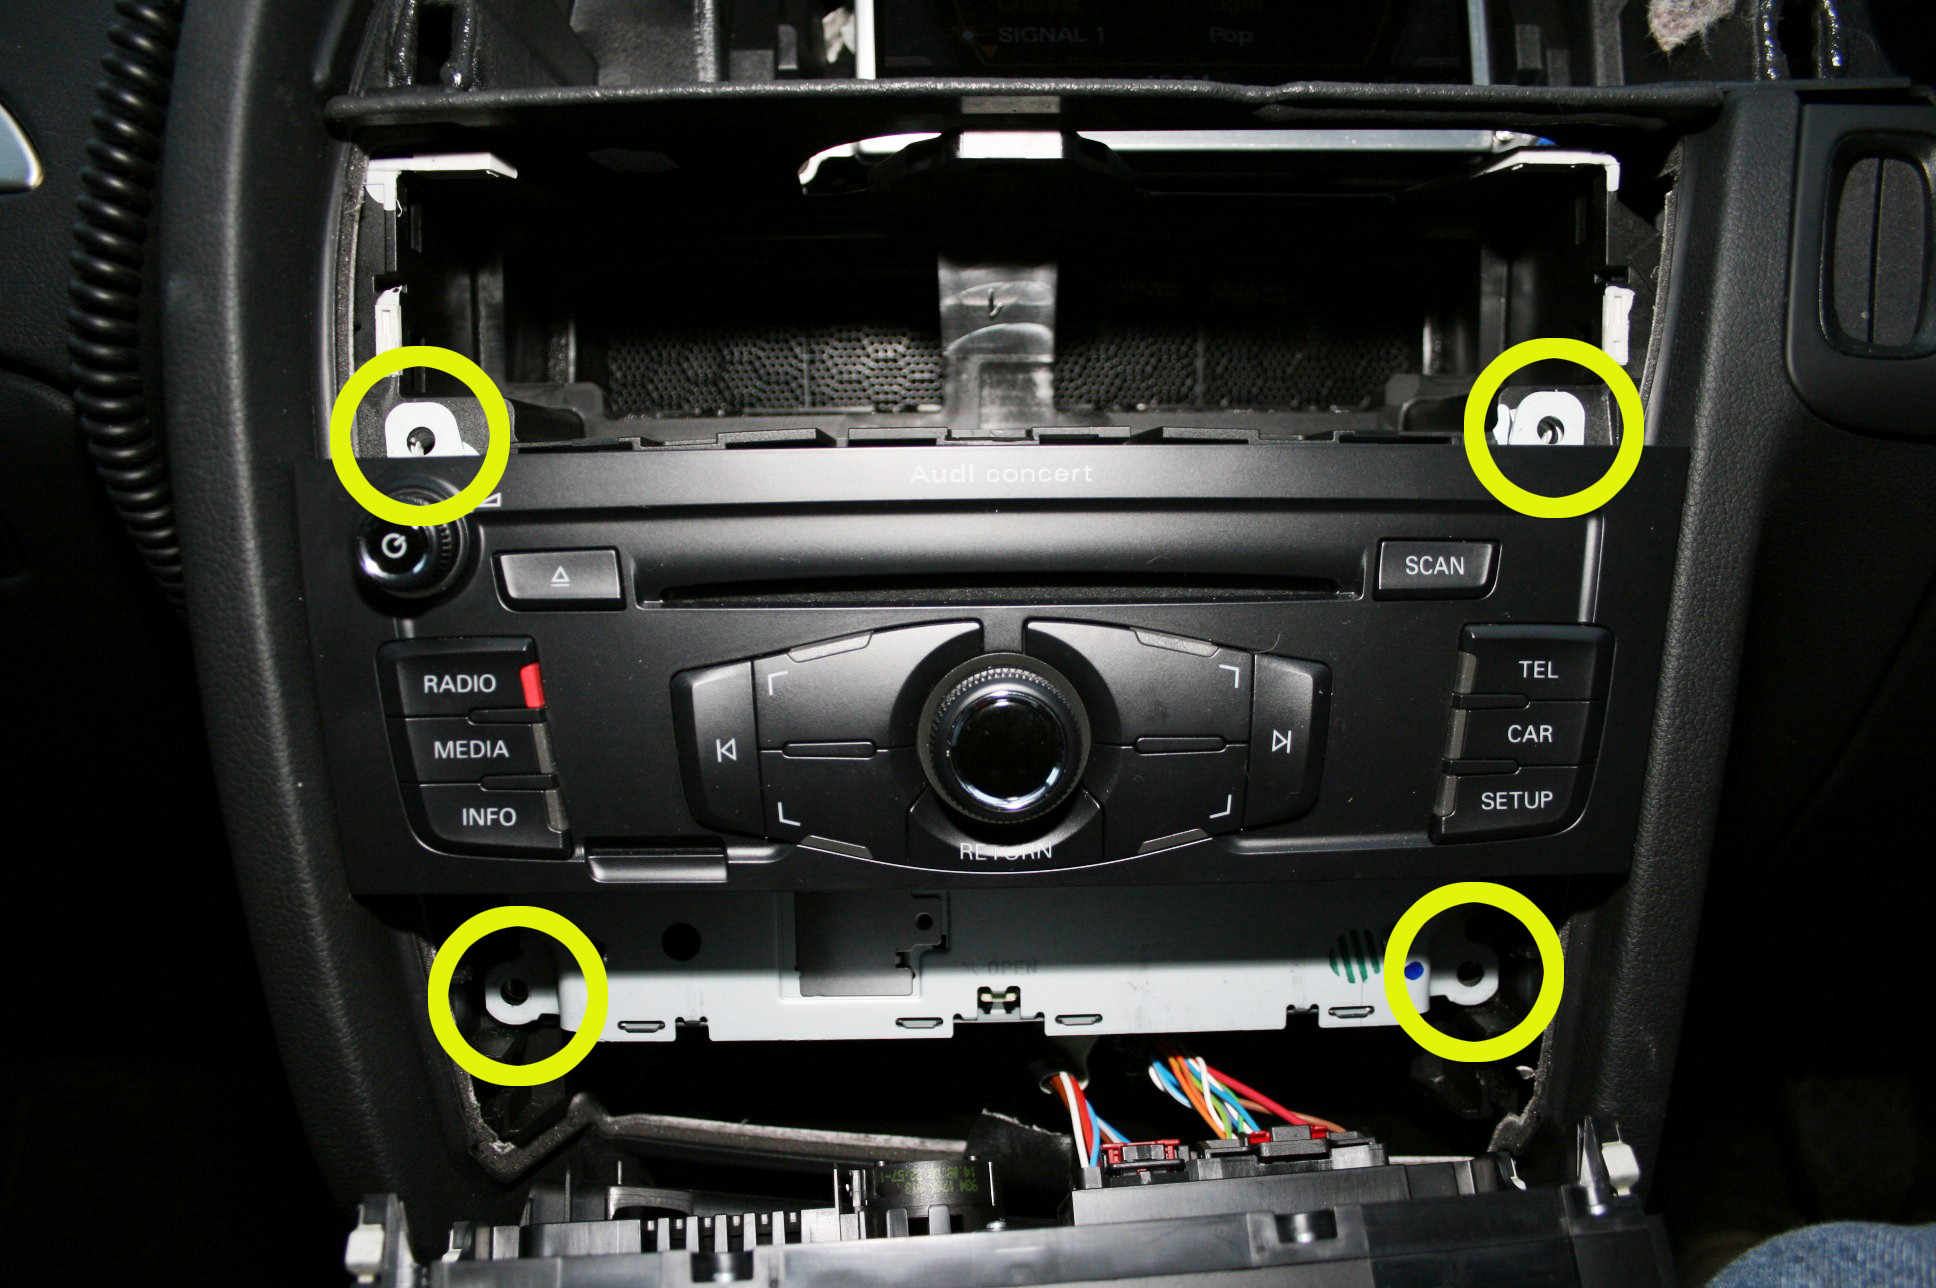
Once the vent assembly and climate control panel are removed, access is available to the 4x 8mm bolts, the locations of which are shown below (bolts removed)
Putting it all back is straight forward, and should be done in the reverse order of removal. Pay attention to the dressing of the Head Unit cables, if they are not positioned correctly, the Head unit will not push fully home. Prior to pushing the Climate Panel, Vent Assembly and MMI surround back into place, check any clips for deformation before pushing home.
I have a Garmin Nuvi 760T in the car. The Antenna "string" with these units is nigh on useless, so if you want reasonable performance of the TMC data available, the best way is to use a GNS "Y-Splitter". This goes in line with the amplified FM/AM antenna feed and provides an output which can simply be connected to the end of the Garmin GTM21 Antenna string by adding a 3.5mm jack socket to the end of it.
The GNS Y-Splitter is available with ISO or FAKRA connectors. I had a unit (which came out of my '03 A6 Avant) with ISO connectors on it, so I had to order Type "Z" male and female FAKRA connectors from Digi-Key and fit them to my Y splitter to enable it to be used in the A4 B8.
I had to do some small modifications to the double FAKRA connector housing on the end of the Antenna lead to get the female connector I had purchased to fit, i.e. opening out of the hole slightly.
If you need to buy the connectors to do the same job, you will need: 1x ARF1647-ND (male) & 1x ARF1526-ND (female).
Assuming you have a Y-splitter with FAKRA connectors fitted...
To insert the Y-splitter, you need to remove the housing from the female connecter on the Y-splitter, then disconnect the double FAKRA housing from the head unit, and remove the purple lock.
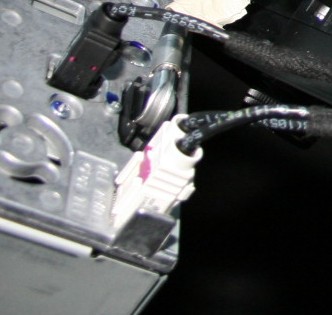
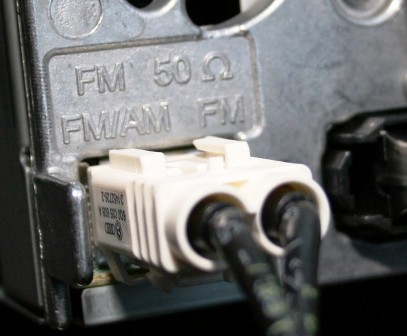
This will then allow you to withdraw the female FAKRA connector from the AM/FM aerial connection (the left one). This can then be inserted into the female housing (that you just removed from the Y-splitter) and then connected to the male FAKRA connector you have on your Y splitter. (Are you following this??)
Next insert the female FAKRA connector (on the Y-splitter) into the vacant position in the double housing. Re-insert the purple lock and re-connect the double housing to the head unit. Tuck the Y-splitter in behind the head unit. The Head Unit can then be pushed back home and the dash re-assembled as above.
I hope you've found this information useful & if you need more information, email me at: jon AT duncreggan.net
Back to the Homepage
Page last updated 27/12/20